The other two are 9x13 inches
Edgefield County native Andrew Corley blogs about art and artists in South Carolina
Tuesday, December 21, 2010
Varnishing an Oil Painting
Some Background Knowledge and Buyer’s Advice
I was a little confused about the types of varnishes out there and didn’t know which ones were bad to use. So I asked a friend of mine. I learned a lot more than I needed to know, but still here is what I was told:
Varnishes, made from resins, have been around for thousands of years. Until modern chemistry, resins came from plant and animal extracts. They often have pleasant smells and were used in religious ceremonies in days of yore. However many craftsmen started using resins because when they are dissolved in solvents and when applied to certain surfaces they can have a protective quality about them once the solvent has evaporated away. After the solvent has evaporated, there remains a layer of protective resin-like layer. However when used on oil paintings, this varnish will last only a limited amount of years before it yellows, cracks or even becomes foggy.
Experts say that varnishes need to be changed (that is removed and re-applied without disturbing the paint beneath) every 40-60 years. If left on the painting these varnishes can damage valuable art work. In fact, I usually do not varnish my paintings unless I want to achieve a specific sheen or antique look.
Damar and mastic resins are still used popularly today. They are derived from plants but even though they are popular they behave quite badly over time. Stay away from water-based “varnishes” if you are painting in oils of course. Although they are fine for some arts and crafts painted with water-based paints and acrylics, you cannot use them on oil paintings. Traditionally these water-based varnishes are used not only to protect acrylic paintings, but also used to give them a shine that is similar to oils.
With oil paintings, it is best to use an acrylic-resin varnish (a solvent based varnish). So you’ll have to read carefully when buying varnish. Instead of dissolving the acrylic-based resins in water, these varnishes use solvents to dissolve the resin. Many of these varnishes have been examined by
accelerated age tests and also with tests for light and energy exposure. Knowledge is power, so buyers beware. If you’re really investing money and time in an important piece of artwork, you might want to re-think varnishing completely. If you decide to go ahead and varnish make sure you stick to solvent based (acrylic-resin) varnishes. Buyers of some more high-end art with varnishes will need to know that their art will need maintenance in years to come.
I was a little confused about the types of varnishes out there and didn’t know which ones were bad to use. So I asked a friend of mine. I learned a lot more than I needed to know, but still here is what I was told:
Varnishes, made from resins, have been around for thousands of years. Until modern chemistry, resins came from plant and animal extracts. They often have pleasant smells and were used in religious ceremonies in days of yore. However many craftsmen started using resins because when they are dissolved in solvents and when applied to certain surfaces they can have a protective quality about them once the solvent has evaporated away. After the solvent has evaporated, there remains a layer of protective resin-like layer. However when used on oil paintings, this varnish will last only a limited amount of years before it yellows, cracks or even becomes foggy.
Experts say that varnishes need to be changed (that is removed and re-applied without disturbing the paint beneath) every 40-60 years. If left on the painting these varnishes can damage valuable art work. In fact, I usually do not varnish my paintings unless I want to achieve a specific sheen or antique look.
Damar and mastic resins are still used popularly today. They are derived from plants but even though they are popular they behave quite badly over time. Stay away from water-based “varnishes” if you are painting in oils of course. Although they are fine for some arts and crafts painted with water-based paints and acrylics, you cannot use them on oil paintings. Traditionally these water-based varnishes are used not only to protect acrylic paintings, but also used to give them a shine that is similar to oils.
With oil paintings, it is best to use an acrylic-resin varnish (a solvent based varnish). So you’ll have to read carefully when buying varnish. Instead of dissolving the acrylic-based resins in water, these varnishes use solvents to dissolve the resin. Many of these varnishes have been examined by
accelerated age tests and also with tests for light and energy exposure. Knowledge is power, so buyers beware. If you’re really investing money and time in an important piece of artwork, you might want to re-think varnishing completely. If you decide to go ahead and varnish make sure you stick to solvent based (acrylic-resin) varnishes. Buyers of some more high-end art with varnishes will need to know that their art will need maintenance in years to come.
Tuesday, December 14, 2010
Turning Turpentine Into Wine
How One Artist Survived this Economy by Taking a Risk and Using His Talent
A good friend of mine (we’ll just call him Calem for now) and art lover from Phoenix, AZ is a full-time, self-employed artist. He sells his art in various galleries around Phoenix and competes regularly in local and regional competitions. However these days he tells me that people are not buying art as much as he would like and he has taken his art career in a new and exciting direction in order to maintain his lifestyle. Not only does a self-employed artist need to be darn good at painting, but he also needs to be able to weather the ups and downs of the economy. Also as Calem has shown us, the long-term artist must be able to step out of the studio and use his knowledge of painting, art, colors and design in different ways.
When I first met Calem, it was back in 2001 when I was visiting some friends of mine in Phoenix. We were out shopping; I spotted a gallery and made a dash in that direction. Inside I found a collection of his work on display. I asked the gallery attendant about the artist and she said that I should meet him myself and politely pointed in the direction of this gentleman who was hunched over a desk in the corner. We became quick friends and have kept in touch ever since. The sad thing is, Calem has fallen on some hard times since 2001 but despite his hesitation to spend less time in the Gallery, he has come out on top by taking his art skills in another direction.
Now I can’t wait to talk to Calem on the weekends to hear about his recent work in art conservation and restoration. Galleries handling art and museums need paintings to be cleaned and restored. Some ceramics, glass objects, and paper objects need special attention as well. Frames also need retouching now and then. So this is what Calem does for various galleries and museums. First he approached a local museum and asked if he could shadow their art restorer. This turned into an apprenticeship and eventually a full-time job. Each time we talk he tells me about some interesting place or gallery he has visited and another exciting show that I “must see”. He’s recently been involved with projects dealing with artists such as O’Keefe and Carmen L. Garza.
This is an inspiring and important story to share. Calem took lemons and made lemonade. Artists need not think that they can use their talents only by making and selling art. Other ideas for artists to make extra income are: photographing art, framing, or designing for furniture and interior galleries. I know someone who took one of her paintings into a furniture dealer in Columbia just to see if they would possibly offer to hang one or two of them for sale. These people ended-up hiring her as a furniture salesman! So the underlying theme here is that artists are naturally creative and can use their gifts to get ahead if they are willing to step outside the box. Moreover, this is a real lesson for everyone, not just artists.
A good friend of mine (we’ll just call him Calem for now) and art lover from Phoenix, AZ is a full-time, self-employed artist. He sells his art in various galleries around Phoenix and competes regularly in local and regional competitions. However these days he tells me that people are not buying art as much as he would like and he has taken his art career in a new and exciting direction in order to maintain his lifestyle. Not only does a self-employed artist need to be darn good at painting, but he also needs to be able to weather the ups and downs of the economy. Also as Calem has shown us, the long-term artist must be able to step out of the studio and use his knowledge of painting, art, colors and design in different ways.
When I first met Calem, it was back in 2001 when I was visiting some friends of mine in Phoenix. We were out shopping; I spotted a gallery and made a dash in that direction. Inside I found a collection of his work on display. I asked the gallery attendant about the artist and she said that I should meet him myself and politely pointed in the direction of this gentleman who was hunched over a desk in the corner. We became quick friends and have kept in touch ever since. The sad thing is, Calem has fallen on some hard times since 2001 but despite his hesitation to spend less time in the Gallery, he has come out on top by taking his art skills in another direction.
Now I can’t wait to talk to Calem on the weekends to hear about his recent work in art conservation and restoration. Galleries handling art and museums need paintings to be cleaned and restored. Some ceramics, glass objects, and paper objects need special attention as well. Frames also need retouching now and then. So this is what Calem does for various galleries and museums. First he approached a local museum and asked if he could shadow their art restorer. This turned into an apprenticeship and eventually a full-time job. Each time we talk he tells me about some interesting place or gallery he has visited and another exciting show that I “must see”. He’s recently been involved with projects dealing with artists such as O’Keefe and Carmen L. Garza.
This is an inspiring and important story to share. Calem took lemons and made lemonade. Artists need not think that they can use their talents only by making and selling art. Other ideas for artists to make extra income are: photographing art, framing, or designing for furniture and interior galleries. I know someone who took one of her paintings into a furniture dealer in Columbia just to see if they would possibly offer to hang one or two of them for sale. These people ended-up hiring her as a furniture salesman! So the underlying theme here is that artists are naturally creative and can use their gifts to get ahead if they are willing to step outside the box. Moreover, this is a real lesson for everyone, not just artists.
Friday, December 10, 2010
Cold weather painting
Well hello again, it's been since August that I last blogged about art and I'm starting my winter vacation. I'm also preparing to do a little painting. So I went out to my storage room this morning and pulled out my painting box. I almost started to prepare my pallet but my paint tubes were like bricks because of the cold. So what does one do when one's paints are harder than bricks and cold?
Just move your supplies into a warm room, wait a couple hours and the paints will feel as soft as they were when you bought them. Watch out trying to speed-up the warming process. Remember most of the thinners and oil-based mediums that we use with oil paints are flammable. So no need to place them up against the heater or fireplace.
If you're working with a wooden or plastic pallet that's nice and cold, it's the perfect time to chisel-off some of the layers of old paint. Just take a stiff wire brush or even a screw driver and pluck those little mounds of paint right off.
Looking forward to a little winter painting!
Above: Painting with Rob Shaw from Havens Framemakers a few months back.
Monday, August 9, 2010
Color Through You: Plein Air Painting
Color Through You: Two Part Plein Air Painting
By Andrew M. Corley 8/9/2010
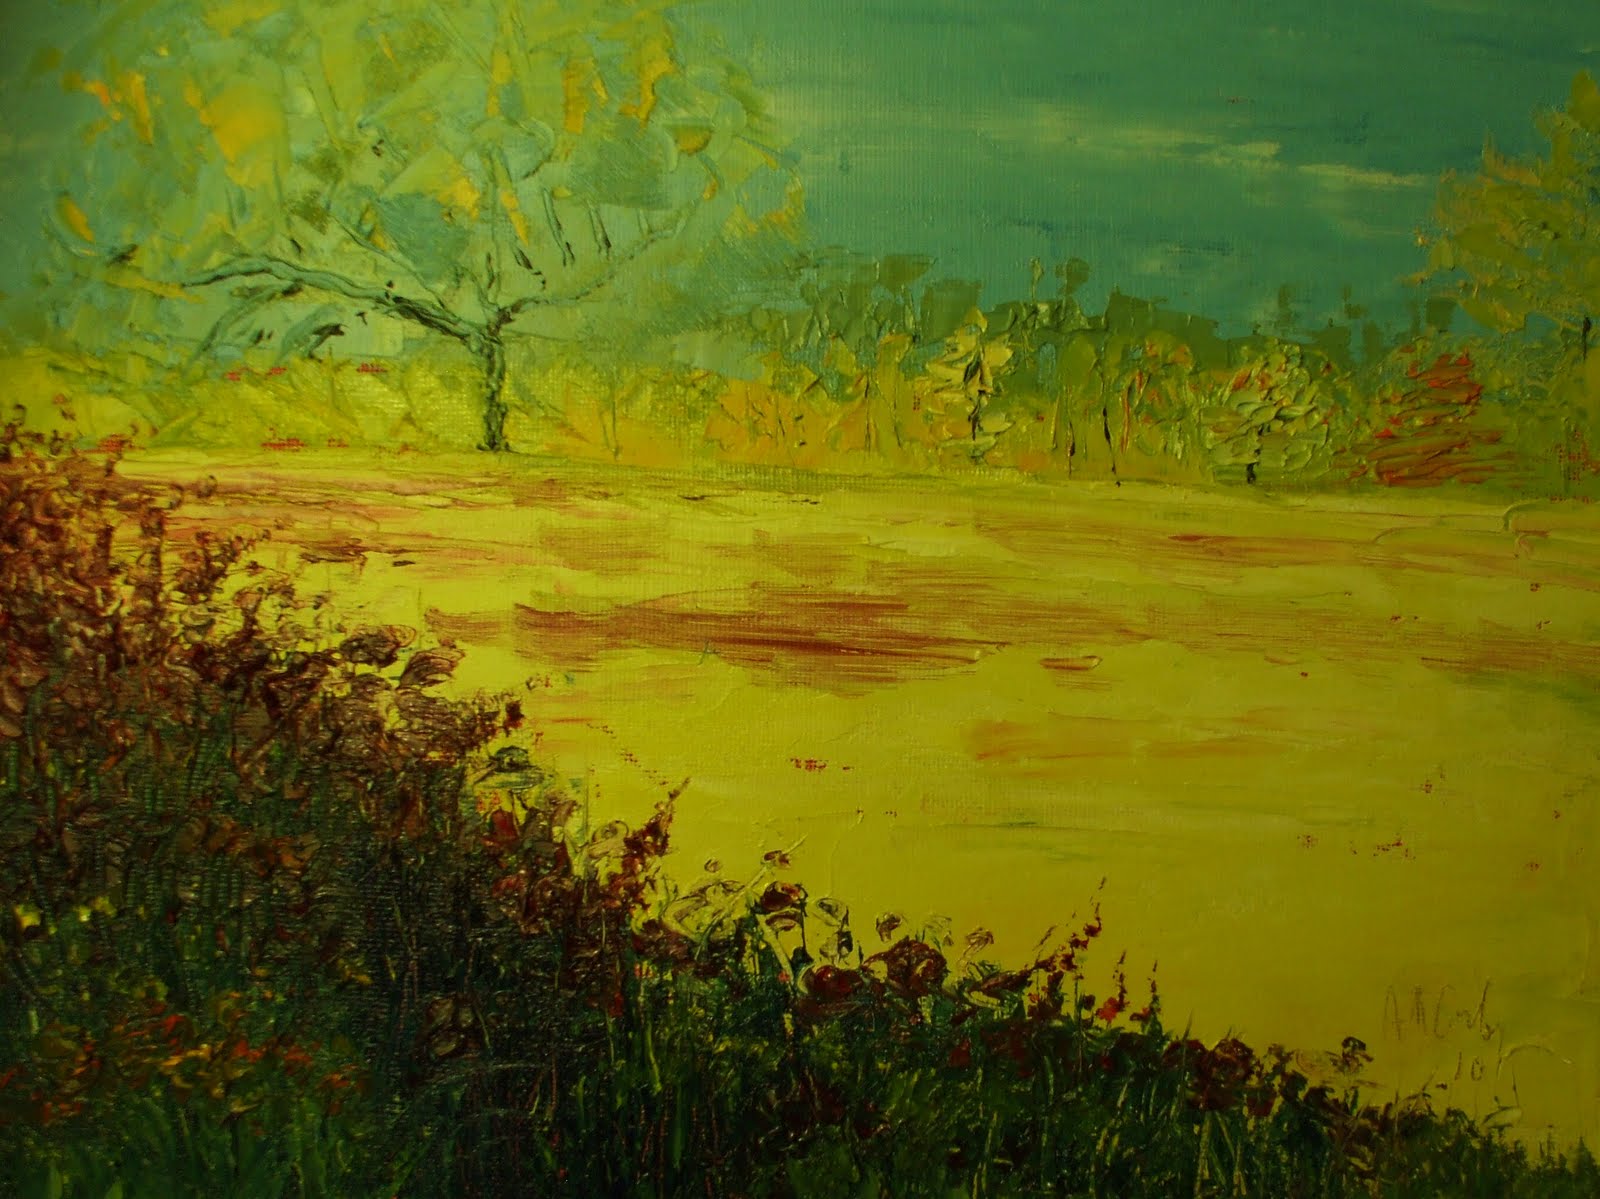
Painting outside can be a challenging and aggravating experience as an artist who is accustomed to painting inside. August heat and humidity as well as the insects can be enough to drive anyone indoors, much less the artist who wants to focus on his painting. Despite the aggravations, plein air painting can bring a fresh change to any landscape artist’s style. Often I don’t have the time to do plein air painting, but when I do it has become a treat. Make sure to have a good canvas already primed with an acrylic undercoat, a way to carry paints and an easel. I use a Jullian field easel. Take your paper towels (I pre-rip mine into quarters) and a plastic grocery bag for easy collection of discarded wipes.
In South Carolina, the summer sun creates a lot of strong heat and glare. So it’s important to wear a large, wide-brimmed hat. Normally outside I wear a baseball cap and shades, but when painting I only use my old, green wide-brimmed hat – no shades when painting. Shades mess with my ability to see colors. Although my hat is ugly and silly looking, it provides shade completely around my head and covers my neck in preparation for being outside for long periods of time. My point is, be prepared. Even though I seldom finish a painting outside, I am outside long enough to hurt my eyes and burn any exposed skin.
Step one: Once I’m set up outside, I lightly sketch my scene with a brush. I always bring a canvas that is already primed with an underpainting of acrylic paint – usually a reddish or orange color that will compliment my greenish, bluish landscapes. I usually sketch-in the rough shapes with a brush and then I approach the painting top to bottom with my pallet knife. I usually shift the skyline up when painting outside because I’m more interested in the landscape not the sky. But it’s up to the artist. Once I have my basic landscape mapped on the canvas I finish my sky and block-in colors below. Once I have my sky completed, my landscape is mapped, and the colors blocked-in and mixed the way I want them for later use, I pack-up and head back inside. This step seldom take more than 30-40 minutes.
Step two: Back in the comfort of your indoor studio, you’ll notice that the colors you’ve mixed are pretty strong (caused from the way you see outside in bright light). But stick with bright colors. It never hurts to exaggerate color. Your painting won’t be as you exactly saw it in nature, but it will be more personal and filtered through your own eyes. This is a nice way of bringing personality to your painting. No matter with whom I paint, even if we are painting the same scene we will invariably have different shades of color. Color is very personal. Keep it that way. Finish your scene inside, either with pallet knife or with brushes – I use both. Stick to the mental image in your mind since you don’t have a photograph to go by. You’ll love the outcome and it will be special. Your colors will have an extra pop and your scene will take on jewel-like quality as you finish the details. Let your colors remain strong, overworking them too much simply mutes and clouds the hues you’ve captured through your mental eye. Step two takes as long as you want it to take depending on your painting medium and technique.
Slather down with sun block and insect repellant and head out with the paints. Have fun with your summer plein air session.
PS- Don’t take food. It draws more insects.
Here are a few of my favorite colors that will help your plein air paintings pop:
Cadmium orange
Cadmium reds, Naptha red
Anthrquinine blue and Cobalt blue
Pthalo green and Hookers green
Lots of white!
For shadows – try different shades of purple instead of muddy-brownish colors.
By Andrew M. Corley 8/9/2010
Painting outside can be a challenging and aggravating experience as an artist who is accustomed to painting inside. August heat and humidity as well as the insects can be enough to drive anyone indoors, much less the artist who wants to focus on his painting. Despite the aggravations, plein air painting can bring a fresh change to any landscape artist’s style. Often I don’t have the time to do plein air painting, but when I do it has become a treat. Make sure to have a good canvas already primed with an acrylic undercoat, a way to carry paints and an easel. I use a Jullian field easel. Take your paper towels (I pre-rip mine into quarters) and a plastic grocery bag for easy collection of discarded wipes.
In South Carolina, the summer sun creates a lot of strong heat and glare. So it’s important to wear a large, wide-brimmed hat. Normally outside I wear a baseball cap and shades, but when painting I only use my old, green wide-brimmed hat – no shades when painting. Shades mess with my ability to see colors. Although my hat is ugly and silly looking, it provides shade completely around my head and covers my neck in preparation for being outside for long periods of time. My point is, be prepared. Even though I seldom finish a painting outside, I am outside long enough to hurt my eyes and burn any exposed skin.
Step one: Once I’m set up outside, I lightly sketch my scene with a brush. I always bring a canvas that is already primed with an underpainting of acrylic paint – usually a reddish or orange color that will compliment my greenish, bluish landscapes. I usually sketch-in the rough shapes with a brush and then I approach the painting top to bottom with my pallet knife. I usually shift the skyline up when painting outside because I’m more interested in the landscape not the sky. But it’s up to the artist. Once I have my basic landscape mapped on the canvas I finish my sky and block-in colors below. Once I have my sky completed, my landscape is mapped, and the colors blocked-in and mixed the way I want them for later use, I pack-up and head back inside. This step seldom take more than 30-40 minutes.
Step two: Back in the comfort of your indoor studio, you’ll notice that the colors you’ve mixed are pretty strong (caused from the way you see outside in bright light). But stick with bright colors. It never hurts to exaggerate color. Your painting won’t be as you exactly saw it in nature, but it will be more personal and filtered through your own eyes. This is a nice way of bringing personality to your painting. No matter with whom I paint, even if we are painting the same scene we will invariably have different shades of color. Color is very personal. Keep it that way. Finish your scene inside, either with pallet knife or with brushes – I use both. Stick to the mental image in your mind since you don’t have a photograph to go by. You’ll love the outcome and it will be special. Your colors will have an extra pop and your scene will take on jewel-like quality as you finish the details. Let your colors remain strong, overworking them too much simply mutes and clouds the hues you’ve captured through your mental eye. Step two takes as long as you want it to take depending on your painting medium and technique.
Slather down with sun block and insect repellant and head out with the paints. Have fun with your summer plein air session.
PS- Don’t take food. It draws more insects.
Here are a few of my favorite colors that will help your plein air paintings pop:
Cadmium orange
Cadmium reds, Naptha red
Anthrquinine blue and Cobalt blue
Pthalo green and Hookers green
Lots of white!
For shadows – try different shades of purple instead of muddy-brownish colors.
Saturday, July 3, 2010
Pawley's Island & sea oats: a summer daydream
"Pawley's Island"
18x14" Oil $100.00 (unframed)
Telephone: 803-336-8477
Will be on display/sale soon at Paperwhites on Courthouse Square in Edgefield, SC.
Check out some of my other, recent paintings there as well.
This painting of sea oats and palmetto trees reflects my recent thoughts about the beach and the ocean. Inspired by a view of Pawley's Isand, this painting portrays the view coming up from the ocean into the dunes and the natural vegetation found along the dunes. During June I have been commuting between Columbia and Edgefield almost daily with teaching and a graduate class which I'm taking. So sadly, there has been no time to drive down to the coast. I guess the next best thing is a mental trip via painting.
I lived in Miami for eight years near the water and beaches. My last place of residence there was on Brickell Avenue. I was right on the edge of Biscayne Bay. So these recent years when I am land-locked, my heart calls me back to the ocean. The incredible vegetation and unique ecosystems along the border between land and ocean fascinate me. South Carolina offers some incredible coastal scene as well. I hear Georgia has some wonderful barrier islands as well. Be sure to email me any great shots of South Carolina and Georgia coastal scenes: corleymark1973@aol.com.
More to come.
Tuesday, May 25, 2010
Local Artist Julia Zimmerman
National Rivers Month Art Show at 300 Senate Street
National Rivers Month Show
The opening reception for our National Rivers Month show will be Wednesday June 2nd 5:30-7:30pm at 300 Senate Street in Columbia. 300 Senate is the address and the name of the restuarant lacated at this address. It is literally the last building on the lower end of Senate Street literally on the banks of the river in The Vista. Stop by as you leave work for a cocktail (cash bar) and a view of all the wonderful art on display depicting rivers and chat with South Carolina artists. For more information contact me via email: corleymark1973@aol.com
Above: "The Vista" by Andrew Corley 20x24 inches Oil
Saturday, May 22, 2010
Framing: What Works & Doesn't
Framing Your Painting
You know, the frame for a work of art is the finishing touch and the last addition that can complement and even improve your work. However poor choices in framing can absolutely ruin a piece of art or diminish the chances for selling. Although framing a work of art is no complicated task, it is a decision that deserves some consideration. Below I’ve organized a few good pieces of framing advice from different sources:
Some paintings will need no frame. Many artists in oils and acrylics who work on wrap- around canvases literally carry their paintings around the edge of the canvas and choose to not frame. Be careful though because when the canvas is not wrapped around to the back of the piece there may be staples showing around the edges. Most of the store bought canvases (as well as panels or paper) will need a frame. Having staples or ratty edges on a canvas being displayed is a huge NO-NO. If you are lucky enough to stretch your own canvases, this is something you’ll want to consider.
What style of frame to choose: The basic rule of thumb is that the painting itself directs the selection of its frame. Period paintings or paintings with classical subject matter are best displayed in attractive gold frames, or a handsome dark wood such as walnut or oak. There are some really elegant hand-carved frames out there but beware they can be pricey. More modern, light-hearted or even abstract paintings deserve simpler frames. Sometimes a thin metallic frame with a color that works well with the painting (not clashing or distracting) will be a winner. Metallic colors also work well. Some galleries, especially in juried shows will require a very simple/neutral frame intended not to detract from the work of art or compete for attention.
And don’t get caught up on framing a painting to match a room. (Although some rooms decorated around the themes and colors of a finished painting can turn out really impressive) Again the key is that the frame should work well with the painting. And for those in doubt, a contemporary painting hanging in a traditional room doesn’t necessarily need a traditional frame - and vice versa. Generally, larger paintings will need larger frames (with wider molding).
Texture is another issue: Choose a finish that doesn’t compete with the art in color or texture. (For example a painting with many shades of blue would not look good in a frame with orange tones
Some frame shops will have walls and walls of frame samples on display. This sometimes makes the process of choosing your frame more difficult. In these cases, I try choose three frames that seem to come close to what I’m looking for. Then I make my decision between those three. When in doubt, ask a framing specialist or someone with experience in art.
Another Tip- Beware of frames with linen liners (in-lay). No matter how often you dust, the linen portion of the frame will collect debris and become yellowed or discolored with time. I recently had to retire an old frame with a linen in-set and hated to see it go. Money down the drain! Not to mention I have to go pay for it to be re-framed.
Monday, May 10, 2010
Watercolorist Rachel Parker


Everyone, it is a pleasure to call your attention to another local artist who recently caught my eye. Rachel Parker is a self taught artist who works primarily in watercolors. As a child, she was raised going to art lessons and watching her mother paint. She has been drawing since she was old enough to hold a pencil, and began painting in 2000.
Rachel works watercolor because she loves the sense of light this medium conveys. In all her paintings, she tries to make light the central theme. “Dramatic lighting can make a potato sack beautiful. Light is a life-giving force, and this is true in a painting as well – it breathes vitality and a sense of awe into the every day,” says Rachel.
Rachel's favorite subjects include horses, dogs, people, cats, wildlife and landscape. Her favorite project is an online photo contest she hosts on Facebook. Members of her group submit photos, and once a month they are allowed to vote on the best submissions. The winner gets their photo painted and a free print of the original. "This allows me to interact with my patrons in a more intimate way", says Rachel. "My patrons become part of my process in a very real way, and that adds so much to my art and my own enjoyment of painting". Prints of Rachel’s work and links to her Facebook group are available on www.rachelsstudio.com.
A Couple May Creations
Sunday, April 25, 2010
The missing link
Finished!?
How many times have I finished a painting and continued to look at it as if something were missing? My mother is a frequent critic of my art. Although I appreciate her interest in my finished products I trust her more sometimes because she is NOT an artist. As a teenager I used to dismiss her observations and critiques with a simple "Whatever Mom". However I've learned to value her opinions about art, not as an artist but because she is not an artist. Let me put it to you this way.
Every artist has a roommate, husband, wife, child or friend who simply knows nothing about art and still continues to give feedback and opinions about your paintings, right? Take advantage of this. Often the buyers of our paintings are not classically-trained artists, but rather just everyday people who enjoy having a painting that really catches their eye. So when your mom or friend comes walking by and has something critical to say about your painting, don't dismiss them, listen. What they have to say may hold the key to selling your painting. And trust me, selling a painting this year will not be easy. It needs to be a real eye-catcher or priced right.
Here are a few tricks I've learned about "finishing a painting". My art critic's most frequent comment is that, "Your painting lacks something" or "there is no focal point". So instead of arguing, I do some of the following:
- Put the painting away for a day or so and then take it out. The fresh eye will help
- Cut a hole in an index card and look at the painting through the hole from across the room. Often you'll see the painting in a different light.
- Hang the painting sideways or upside down. The change in perspective will tell you when there is something wrong or obviously missing.
- Lastly, try placing your painting behind you somewhere and observing it with a mirror.
- Pretend you're in the market for a piece of art. Line up a few of your pieces against a nice white or neutral wall and "pretend to shop".
Well I hope these tips help you look at your paintings through a different eye. And remember take all the feedback you can get, even if your don't want to hear it.
2010 is going to be a hard year for selling art.
Admittedly, I have not been posting much lately. Since school is winding down for the semester I will be writing more often. Don't forget to send me photos of your art for publishing and sharing on my blog. Also for an idea about an article or submission of an article about art... just email it to me: corleymark1973@aol.com
Andy
Saturday, March 27, 2010
Artista Vista @ 300 Senate
Artista Vista which happens to fall on Earth Day 2010; times are from
5 - 8 p.m, Thursday, April 22.
I will be displaying a couple new paintings during the show. For more information about displaying your work contact Rachel Haynie. Her email is art.300Senate@gmail.com The show will focus on Earth Day related themes.
Above is a marsh painting that I plan to show.
Andy
Thursday, March 11, 2010
Benefit Art Show @ McKissick (Space is limited.)

"Valencian Women On The Beach" by Joaquin Sorolla y Bastida
START PAINTING NOW !!!!
Benefit Art Show
McKissick Musesum
September 2010
Theme: “Bridging Cultures in South Carolina” (Paintings should focus on cultural diversity in South Carolina with an emphasis on the Latino community.)
Reason: We want to raise money to benefit a non-for-profit organization (to be named) which helps local Hispanics. One possibility is The Amigos Del Buen Samaritano (free clinic).
How: During Hispanic/Latino Heritage Month the McKissick Museum at USC and several other organizations on campus will host a show.
Want to participate? This event is still in planning but for more information, continue to check this blog. My reason to publish this information so early, is to allow artists to begin the creative process for a painting. Please pass on this information to fellow artists who might want to participate in such a good cause. I will formally circulate this information when all of the planning is complete at USC. So start planning and painting.
There is only space for one painting per artist. Works should be framed or ready for sale/display - with a suggested price on the back. This will take place some time in September.
Website address: www.anartistsadventure.blogspot.com
Thanks,
Andrew M. Corley
Sunday, March 7, 2010
Michael Dwyer


My latest encounter with artists from South Carolina was with Mr. Michael Dwyer. I met Michael through Facebook and Facebook connections at USC of mine. I am happy to share some of his biographical information and art on my blog. Make sure you visit his website: www.michaeldwyerart.com
Michael Dwyer earned his Bachelor of Fine Arts degree in 1985 from Syracuse University and his Master of Fine Arts degree in 1993 from the University of South Carolina. At both schools his area of study was Studio Arts, with a concentration in painting. Dwyer has lived in Syracuse, NY; Providence, RI; and since 1990, Columbia, SC, where he works as Exhibition Designer and Preparator at the Columbia Museum of Art.
His work has been exhibited in Syracuse, Providence, and various cities in South Carolina. Currently his paintings can be seen in "A Phonic Swath: Paintings by Michael Dwyer" at The Etherredge Center for Fine and Performing Art, University of South Carolina Aiken (March 1st - 30th).
Dwyer's Statement:
I come from parents who are both artists. While my mother set aside art production, for the most part, when they began a family, my father has been a painter throughout my life. Many of their friends, colleagues at Syracuse University, were artists, architects, or writers and our home was always a place with big, modern paintings on the walls and jazz on the record player. As a kid, I loved visiting my dad's studio. I liked the spattered dishevelment, the smell of paint, and the paintings that I couldn't fully understand, but instinctively got, in the process of coming to life. I knew at an early age that this was something I wanted to pursue.
My decision to work abstractly is visceral and intuitive. It stems from a belief that in any visual art, there are abstract elements which need to function well for the work to succeed. These qualities are at the core of all visual art and transcend cultural and historical differences.
Subscribe to:
Posts (Atom)
